

16 December, 2021 10:22 AM
A friend and colleague of mine is a sales rep for two different book printers. (This is a little like what I do, although I’m completely independent, working with multiple printers as a representative for my clients. In contrast, as a sales rep my colleague has the firm backing of two specific book printers. One printer focuses on color work. The other focuses on black-ink-only print books.)
Recently, my colleague sent me information on a custom screen printing press one of these two printers had bought and put into service to apply special coatings to print book covers.
I found this interesting, primarily because it is a hybrid process involving both offset printing and serigraphy (custom screen printing). So I did some research online in order to share this process with you.
The Equipment
My colleague’s book printer has a Sakurai Maestro MS-102AII screen press, a cylinder press which accepts a 29.5” x 41” press sheet and cures the screen printing inks and coatings using UV drying technology.
According to its online specification sheet, this screen printing press can print up to 4,000 images an hour on substrates ranging from .003 inches to .032 inches in thickness.
When you watch this press operate online in one of a number of YouTube videos, it’s a rather interesting machine. The overall build of the machine resembles a small offset press, with its automated feeder at one end of the press and its bin for completed press sheets at the other end. But in the middle, it has a stationary squeegie with a movable serigraphy screen underneath. When the screen moves, the squeegie forces ink (or cover coating) though the mesh screen and onto the cut sheets traveling through the press along the internal conveyor.
The Sakurai does not look like the multi-unit carousel screen printing presses used to print textiles. These have more of a wheel-like operation, with multiple screens accessible to the printing platform, all of them in a circle that can be rotated as needed to reposition new screens to print additional colors.
Rather the Sakurai looks and sounds more like an offset press.
If you continue to watch the videos, you will see the press sheets leaving the screen printing section of the press and traveling through the UV dryer. This drying process is based on the ability of UV inks to cure instantly when exposed to UV light. That the equipment specifications also reference LED ink-curing suggests that low-power, but equally effective, LED lights are used to cure the ink. This reduces the heat of the press and dryer (and also the resulting cost to cool everything).
How Would You Use Such a Press?
If this press lays down only one ink at a time, how would you use it?
According to its promotional material, the particular book printer my colleague represents uses this press for “specialty finishing applications over offset printed material, including: spot raised UV clear/high gloss, spot glow in the dark, and spot soft touch [coatings].”
What this means is that this book printer does not need to dedicate one unit of an offset press to a special coating process. Rather he can focus on printing the maximum number of inks in one pass on the offset press, and then after the press sheet has dried, he can send it through the Sakurai screen press to lay down a thick coating on the book cover (a coating that might not be appropriate for use on an offset press). Moreover, the printer’s promotional literature notes that the application can be either a “spot” application or a “flood” application. (It can cover the entire press sheet or only a portion of the sheet, allowing for a subtle, or not so subtle, contrast between one coating and another on the same book cover.)
The printer’s promotional information on the Sakurai Maestro MS-102AII screen press goes on to describe the substrates on which the equipment can print: “The Maestro is capable of printing on a wide range of substrates such as plastic film for electronic applications, membrane switches, display panels, touch screens, etc., as well as paper, board, and foil….”
This makes the Maestro useful not just for book printing and promotional printing but also for industrial or functional printing (printing on objects like computer screens or printing circuit boards for electronic devices).
But for a book printer it also opens up avenues for more dramatic cover coatings, such as the thick, almost rubbery soft-touch product, a tactile coating that will set a print book apart from any screen-based ebook.
The specification above also includes foils as substrates, allowing a printer to create metallic book covers. And with the UV formulations used in the process, the inks can easily cure and adhere to the non-porous surface of foil.
Now let’s revisit the size and speed of the press. When you consider the fact that a lot of specialty presses are rather small in format (closer to 13” x 19”), the 29.5” x 41” maximum sheet size accepted by the Sakurai Maestro MS-102AII is more than ample. So a book printer can impose multiple copies of the book cover onto a press form, which will allow more copies to be printed (or coated, as in the case of this book printer) more quickly. This is a real press that accepts standard press sheets.
Moreover, the 4,000-images-per-hour press speed noted in the printer’s promotional sheet is a respectable speed. (To put this in perspective, a Komori Lithrone offset press, which I just found at random on the Web, prints at a maximum speed of 13,000 sheets per hour, and this is a high-speed offset press, not a screen printing coating unit.)
Finally, it is useful to remember that not all coatings will adhere to all printed products. For instance, some digital presses using toner and fusing oil will have serious problems with various kinds of coatings not adhering to printed products. In the case of my colleague’s printer’s Sakurai Maestro MS-102AII, the coatings have been formulated to work well with offset printed book covers, providing both durability and visual enhancement to the printed product.
One Final Suggestion
My colleague’s promotional literature from the printers he represents doesn’t tell you this, but not every book press has this kind of coating equipment on the pressroom floor. If you are producing this kind of job, you will get better pricing and faster turn-around if your printer does not need to subcontract the cover coating work (which many printers need to do for certain coating processes). In this light, it will serve you well to request samples of the coating options your printer can provide with in-house equipment.

16 December, 2021 10:21 AM
The summer before college I worked (one on one) with a Mexican ceramics artist. He was the artist in residence at a church attached to a local high school. Night after night I would take a bus to his studio and learn (of all things, not pottery making but) custom screen printing. He was skilled at both disciplines.
I learned a lot over these months. I brought in a hand-drawn surrealistic image in multiple colors. The first thing I learned was just how labor intensive the process of screen printing was. For each color I had to cut a separate mask (or stencil), removing selected bits of a plastic block-out sheet I had attached to the nylon screen with adhesive. I cut with a small, sharp knife point and then peeled away any masking plastic in areas that would print.
Each time I would finish preparing the mask (on the screen) for a particular color of the 6- or 8-color job, I would attach the framed screen (silk stretched over a wood frame) to the hinges on the base board, pour thick, brilliantly colored screen printing ink onto the far side of the screen-printing frame, and lay a sheet of paper between the screen and the base. Then, using a squeegee (a rubber strip on a wooden handle the width of the wood frame), I would draw the ink across the screen.
The ink would seep through (literally, because it was such a thick ink) the screen and onto the paper. Anywhere I had removed the plastic masking material attached to the silkscreen, the ink would flow through the screen and onto the paper. Anywhere I had left the plastic sheet intact, this block-out stencil would keep the ink from reaching the paper.
So I would print sheet after sheet this way, starting with the first color. Then I would remove the plastic block-out sheet from the screen completely, wash everything down, prepare the next stencil for the next color, and print each and every sheet on which I had printed the prior color.
It was a long, long process, from the inception of my design to the finished stack of screen prints. Night after night I would do this in the ceramic artist’s studio. I appreciated how thick the ink was, and how intense its color was. It was a good education. I never forgot the patience it required.
Using Screen Printing at the Art Museum
Within the same time period before college (during the day), I also had an internship at a DC modern art museum. Since I was getting an education in custom screen printing at night, I was particularly alert to how the art museum used screen printing to prepare for an upcoming exhibit. They would screen print the three- or four-paragraph description of each painting (and explanations related to each room in the exhibit) right on the wall. This intrigued me.
So I asked some questions and did some research, and I learned that they had prepared the screens with a photographic emulsion. Using typeset material as a starting point (either projected onto the silk screen or attached to a clear acetate sheet), they projected ultraviolet light through the mask or stencil. Where the light reached and exposed the photo-sensitive emulsion (UV light-sensitive rather than visible-light sensitive) on the screen printing fabric, this light hardened the emulsion.
Everywhere else, the emulsion had not hardened. As the screen was washed (the next step), the water removed the emulsion that had not been exposed to UV light, leaving the typeset words as “holes” within an otherwise opaque mask over the screen. Museum staff could then hold the screen (loaded with ink) up against the wall, draw a squeegee across the frame, and transfer the screen printing ink through the mesh and onto the wall. Once the screen had been removed, there it was: the typeset paragraphs explaining the exhibit or the specific art piece.
In this particular case (unlike the silkscreen I was producing at night in the artist’s studio in the church), these wall screen prints were one color. So registering one color to the next (as I was doing at night) was not an issue.
Moreover, in my case, I was cutting the masking material with a knife (shapes of color, not intricate typescript), and at the museum, the process of preparing the screen was a chemical and photographic (rather than manual) one. I learned later that the same process they were using could be used for photographic halftones and even multiple-color halftones (just using a coarser halftone screen ruling than for offset lithography).
So printing was in my blood by the time I was 18. Both of these experiences (learning silkscreen with a Mexican sculptor/potter and working at an art museum) paved the way for the following forty-five years’ work in all aspects of fine art, commercial art, publications management, and commercial printing.
What Else Can You Use Screen Printing For?
Having had these formative experiences, I was aware of and highly alert to custom screen printing, also called serigraphy, in my work. I noticed that screen printing was great for objects that couldn’t be offset printed. (For example, you can’t run a 3-ring binder through an offset press, but you can use a screen, or multiple screens, to print on the vinyl-covered boards of such a binder.)
You can also print on hats, mugs, messenger bags. If you Google “promotional items,” you will see all number of functional products you can embellish with custom screen printing. In fact, if you look closely at these printed products, you will see just how thick the ink is. It’s like paint. And I for one believe that this thick ink projects an air of opulence.
Wallpaper is another product that lends itself to custom screen printing, particularly since there are cylindrical screens (the screen I was using at night and the one used at the museum were flatbed screens) that allow for essentially continuous custom printing of patterns. In this case, the ink and squeegee are inside the rotary screen, and the cylindrical press can be rotated again and again to create and endless pattern.
T-shirts as well as other similar garments are also often screen printed. In fact the ink can be formulated to puff up slightly above the garment’s surface, to be metallic, or to have the texture of suede.
Signs are another lucrative custom screen printing market. And in most of these industrial printing venues the screens are not silk, as mine was, but either stainless steel, nylon, or polyester mesh. The finer the mesh, the finer the halftones. However, fine screens can easily plug up, since the ink is especially thick, so this does limit the fineness of the line screen used for halftone images.
And finally, the substrates don’t have to be paper or fabric. You can print on metal, plastic, wood, ceramic, even glass.
Screen Printing vs. Digital Printing
In all of these cases, the products have been made on custom screen printing presses, either single-color frames or in some cases (for multi-color t-shirts, for instance) a carousel of screens attached at a central point. These screens can be rotated into and out of the image-printing area to speed up the process.
But it is a time-consuming process nevertheless, with all the screen preparation, printing, and cleaning steps.
Back when I was screen printing the surrealistic design at night, and watching the museum staff screen print text on the wall during the workday, it was the late 1970s, so digital printing had not yet been invented.
Now, many of the products manufactured with custom screen-printing technology can be produced with inkjet printing technology in some cases and dye sublimation technology in others (such as printing on mugs). This now allows for variable-data printing. In fact you can make each item different, which you can’t do with screen printing.
That said, there’s still room for screen printing in product design (i.e., functional printing or industrial printing). For instance, you might want to print special conductive inks on printed circuit boards that will be used for electronic devices. Or you may want to screen print text on the control panels of microwave ovens.
Screen printing is still out there, still an ideal technology for specialized uses. However, it’s best suited to longer runs, due to the labor-intensive processes it involves.
09 December, 2021 02:46 PM
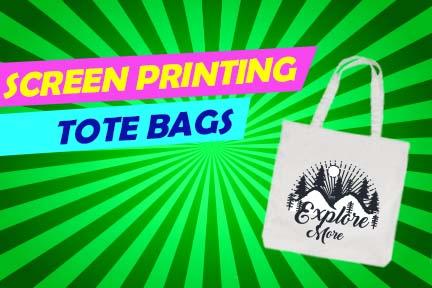
Tote bags are a staple for screen printers. There are a lot of companies that want to sell canvas bags with their logo on them. So what does it take to create screen printed tote bags? We clear up the mystery.
The first thing you need is a good supplier for tote bags. There are a lot around. We recommend S & S Activewear. Doing a quick Google search can help you find a lot of different suppliers. Make sure that they are reputable and that their prices are reasonable. The prices for totes are pretty low, but they usually require you to require a minimum amount.
This is where totes are different from screen printing garments such as t-shirts. When you screen print a t shirt you create the screen with the image upside down. That is not true with printing totes. You will invert the image for a tote. Otherwise the image will be upside down on a tote bag.
You will insert your screen into the press. Find the center mark. Tighten it down. At this point the logo should be facing you. This is because the tote will be slid onto the platen like you would with a t shirt.
Before you start printing you will need to draw a line on your platen. This will show you how far up you need to pull your canvas tote on the platen each time that you want to print totes. This may take some trial and error to get the exact spot that you want to print.
Add the ink directly to the screen and then lift the screen up. Using a spray adhesive, spray the platen thoroughly. Then slide the tote onto the platen up to the line that you drew in the previous step.
Pull the screen down. Then using a squeegee, you will flood the screen with ink. Once the screen is flooded you will print the tote. Run it through twice so that you compensate for any rough edges on the tote. That’s it.
Screen printing tote bags is not that much different from screen printing shirts. You have to remember to create the screen inverted. The logo should face you. Not away from you. Run the squeegee over the print twice so that you can accommodate for the rough fabric. You will have perfectly designed tote bags.